“Since hunger is the most primitive and permanent of human wants, men always want to eat, but since their wish not to be a mere animal is also profound, they have always attended with special care to the manners which conceal the fact that at the table we are animals feeding.” - John Erskine
Showing posts with label bread. Show all posts

12 August 2014

Garlic Bread Meatballs – Middlest in the kitchen


It’s summer.  (It’s still officially summer at our house, since school doesn’t start for another week.)  I don’t know about you, but cooking really becomes a chore for me during the summer.  Not that I love it during every other season, but in the summer it’s just too hot for me to want to do anything but send Hubby out to the grill with a couple of Franks or Patties.  So this summer we (meaning the Meanest Mom Ever – aka: me) decided that once a week each child would help mom cook.  It’s lovely when it’s Oldest’s turn, since I can pretty much turn him loose in the kitchen with a reasonable expectation that he will emerge with something, if not delicious, at least edible.  And on Middlest’s and Littlest’s days it’s kind of fun to hang out with them and teach them the magic of mixing “secret ingredients” to create something lovely.  And I’ve learned a surprising lesson myself: if they make it, they will eat it.  Can you believe that?  I actually got Littlest AND Middlest to eat pasta sauce on noodles, by calling it pizza!  But that’s a story for another post.

At the beginning of each month, I sat down with each of my boys and went through all the thumbnails of my Pinterest recipes and had them pick four recipes that they thought looked yummy.  I then made a grocery list of all the ingredients we would need to create their fabulous feasts and we all trekked to the store together.  (Ah the joys of a family trip to Wal-Mart.  The fighting, the whining, the begging, the fighting.  That’s one part of the summer I won’t miss!)  And we’ve found several new recipes to add to our collection that (gasp!) everyone in the family enjoys.  Starting with:
Garlic Bread Meatballs
found here
makes 20
1 can Pillsbury golden layers biscuits
10 frozen fully cooked Italian style meatballs - thawed and cut in half
2 sticks string cheese - cut each into 10 pieces
1 tablespoon parmesan cheese
½ teaspoon Cheff Tess Italian seasoning (or your fave)
¼ teaspoon garlic powder

Heat oven to 375˚.  Separate dough into 10 biscuits.  Separate each biscuit into 2 layers.  Press each layer into a 3” round. 

Place 1 meatball half and 1 piece string cheese onto each round.  Wrap dough around meat and cheese, pressing edges to seal.  Place into an ungreased 8” or 9” round cake pan, seam sides down in a single layer.  Sprinkle evenly with parmesan, seasonings and garlic powder. 

Bake 20-25 minutes until golden brown and no longer doughy in the center.  Serve with warm marinara for dipping.

26 December 2011

oat bread with ham & cheese soup


Yep, I made bread again.  Finally!  And what bread.  Mmm!  So soft, so flavorful, so yum!  If you haven’t made bread yet, this may be the recipe to start with.  I’m not sure you can go wrong with it.  Really, really a must try!

Tess’s Oat Bread Recipe
combine:
3 cups rolled oats
2½ cups water or milk no hotter than 110°
½ cup honey
¼ cup olive oil
2 teaspoons yeast

Allow oats to absorb the water and the yeast to get hyper active.  This usually takes about 30 minutes.  On the plus side, this softens the oats without cooking the starch.  The main difference between using cooked oats and uncooked oats.  Starch will still cook, but not be gummy.  Tender loaf.  Oats...soft...good.

add:
3 cups whole wheat bread flour
1 tablespoon salt

You may need more or less flour depending on the storing conditions of the flour.  I usually opt for less flour whenever possible.  I knead by hand in the bowl and avoid using too much flour.  300 turns if you can do.  You can use a mixer.  3-4 minutes medium speed.

Form into a ball and allow to raise until doubled.  If I am busy I will put the bread in a covered bowl in the fridge at this point and let it raise there.  That gives me a couple more hours to get running around done.

So.  Allow the dough to raise then use the loaf molding technique (found here).  In the case of this bread I have found steaming the loaf in a covered clay crock to be by far, my favorite application.  Lightly oiled and then free standing large double loaf using all the dough.

Allow bread to raise until twice its size and very fluffy.  Bake in oven pre-heated to 425° 40-45 minutes (or until internal temperature reaches 170°).  Allow bread to cool before slicing.

This bread you will find to be very moist and have a shelf life of 3-4 days if it lasts that long.

I don't have a clay crock, and wanted standard loaves for sandwich making, so after the first (and second ~ I forget about my bread dough a lot) rise, I divided the dough in two and put it in bread pans.  As usual for me, I left the bread rising a little too long in the pans, so it took on a weird shape.  I went to another bread recipe to figure out baking for pans, and ended up baking it at 425° (because I live in Utah) for 20 minutes, then 350° for 15 minutes.  It looked a little weird from over-rising, but tasted amazing.  Especially when dipped into soup.  Mmm, soup. 
And speaking of soup, this was a weird experiment in cooking gone right.  That doesn’t always happen to me, and I’m hoping I can remember everything I did so that I can do it again.  So yummy!  Here’s where it started:

Cordon Bleu Potato Soup
serves 4
2 cans (10¾ ounces each) condensed cream of potato soup
1 can (14½ ounces) chicken broth
1 cup (4 ounces) shredded Swiss cheese
1 cup diced fully cooked ham
1 cup milk
1 can (5 ounces) chunk white chicken, drained
2 teaspoons Dijon mustard

In a 2-quart microwave-safe dish, combine all ingredients.  Cover and microwave on high for 5-8 minutes or until heated through, stirring twice.

We love cordon bleu and I thought this would be a great soup to try.  But when I went to make it I realized that I didn’t have any cream of potato soup.  (I thought the recipe called for actual potatoes.  Go figure.)  Ok.  Cream of mushroom will work so I grabbed a couple of cans of that.  I got out the canned chicken and just didn’t feel much like chicken.  Hmm.  So I just started throwing things in a pot, and here’s what I came up with.

M’s Ham & Cheese Soup
serves 8 (or a family of 4 animals + mom)
4 cans (10¾ ounces each) cream of mushroom soup
2 cans (14½ ounces each) chicken broth
1 cup shredded Swiss cheese
1 cup shredded cheddar jack cheese
1-2 packages (8 ounces each) diced ham
(You can use cubed, but we usually have diced on hand for pizza.  I buy it at Wal-Mart in the “deli” packaged meat section ~ you can’t get it from the actual deli.)
2 cups milk
2 tablespoons mustard (I used regular yellow)
½ teaspoon dill weed
½ teaspoon celery seed
salt to taste (I, of course, used season salt)

Add soup to a medium-sized pot over medium heat.  Pour in chicken broth a little at a time, stirring well or whisking to prevent lumps.  Add all other ingredients and heat, stirring occasionally, until cheese is melted and soup is heated through.  Serve with dippy bread.

I’m not exactly sure of the amounts of everything I used ~ it was mostly just dump or sprinkle or squirt and taste ~ but I gave it my best guess.  As I was mixing away I decided I wanted it to taste as much like a ham & cheese sandwich as I could, which explains the dill, celery, mustard, and the most important ingredient, dippy oat bread.  It tasted so good, and everyone love it.  Well, everyone except Middlest and Littlest, who refused to taste it and only ate the bread.  I think they’re getting tired of soup...

25 November 2011

a day of thanksgiving


November comes
And November goes,
With the last red berries
And the first white snows.
-Clyde Watson

First, let me say that one of the blessings I’m thankful for this year is this blog, and you, my handful of lovely readers.  You have no idea how much just thinking about you reading about it inspires me and makes the drudgery of everyday cooking so much more enjoyable.  Thank you, thank you, thank you!

And now, on with the bloging.  Ok, I haven’t blogged for quite some time.  It’s not that I don’t love you all, it’s not even because I haven’t been cooking, there’s just been a lot going on this month: sinus infections, ear infections, pink eye... And we changed internet providers so we didn’t have internet for several days.  I have a lot of catching up to do.

This year for Thanksgiving I was assigned rolls and sweet potatoes.  Rolls were easy.  I honestly was going to try making them from scratch, but my sister-in-law ~ who was in charge this year ~ requested the same rolls I brought several years ago using Rhodes frozen rolls.  So.  Easy peasy lemon squeezy.  Here’s the recipe.

Butter Crumb Rolls
source: Rhodes
12 frozen dinner rolls
½ cup bread crumbs (or Ritz crackers, finely crushed)
½ teaspoon dried basil
½ teaspoon dried oregano
3 tablespoons butter, melted
Place rolls on a baking sheet sprayed with non-stick cooking spray.  Cover with sprayed plastic wrap and let thaw (about 45 minutes).

In a shallow bowl combine crumbs and herbs.  Remove plastic wrap and brush thawed rolls with butter and then sprinkle with crumb mixture.  Replace plastic wrap and let rise until double in size.

Bake at 350° 15-20 minutes.
I stole this picture from Rhodes' website, since I was much too stressed to take actual pictures myself.
Mmm.  Hot and fresh and yummy.  I made 2 dozen for 8 people and there were nothing but crumbs to take home.  I think Littlest ate 5 himself.

 The sweet potatoes, on the other hand... Well, none of us at my house actually eat them.  I remembered seeing a post for a sweet potato recipe that sounded yum (if you’re into that sort of thing, which, as Ive mentioned, Im not) but since I didn’t think I’d be making any this year, I deleted it and couldn’t find it again.  So I went searching and came up with this recipe.  According to Heather, the recipe poster: “Once you taste this, you won’t ever go back to the marshmallow-topped variety!  (How could I resist trying them after that inspirational endorsement?)  I have peeled and cooked in the microwave, and also boiled the sweet potatoes.  They taste the same no matter how you cook them.  So, use the technique that works best for you!”

Gourmet Sweet Potato Classic
serves 8
5 sweet potatoes
¼ teaspoon salt
¼ cup butter
2 eggs
1 teaspoon vanilla extract
½ teaspoon ground cinnamon
½ cup white sugar
2 tablespoons heavy cream
¼ cup butter, softened
3 tablespoons all-purpose flour
¾ cup packed light brown sugar
½ cup chopped pecans

Preheat oven to 350°.  Lightly grease a 9x13 inch baking dish.

Bake sweet potatoes 35 minutes in the preheated oven, or until they begin to soften.  Cool slightly, peel, and mash.

In a large bowl, mix the mashed sweet potatoes, salt, ¼ cup butter, eggs, vanilla extract, cinnamon, sugar, and heavy cream.  Transfer to the prepared baking dish.

In a medium bowl, combine ¼ cup butter, flour, brown sugar, and chopped pecans.  Mix with a pastry blender or your fingers to the consistency of course meal.  Sprinkle over the sweet potato mixture.

Bake 30 minutes in the preheated oven, until topping is crisp and lightly browned.
Not the yummiest picture, I admit.  It looks a bit like a weird stake to me.  But again, I didn't manage to take my own pic.  Too bad too, because they looked so very yum.
This one I did modify.  (Just when you were about to be amazed that I followed the recipe exactly!)  Why oh why would I cook my own sweet potatoes?  Ok, I probably should have cooked my own sweet potatoes, but since I knew from bringing sweet potatoes in previous years that you can buy them pre-cooked in a can, I certainly wasn’t going to cook my own sweet potatoes.  So I made a last minute run to Target to buy canned sweet potatoes.  No canned sweet potatoes left on the shelf.  Wait, did I remember reading that you mash the sweet potatoes?  Yes, yes I did.  So I grabbed the last 4 cans of pureed sweet potatoes.  (Looked for a picture to show you what I bought, but couldn't find it anywhere on Targets website.  Sorry.)  That should add up to about 5 real sweet potatoes, right?  Seemed to work out just fine.

Last week was my father-in-law’s birthday and we took him out to eat at Texas Roadhouse ~ his favorite.  I noticed that as one of his sides he got their sweet potato and it was covered in marshmallows.  I just couldn’t stand disappointing him by leaving the marshmallows off, so here’s what I did.  I made the recipe just as it’s written (using the amazing Wise Woman of the East spices that my rock star friend Chef Tess sent me. ~ Thanks again, Stephanie! ~  Oh these spices are to die for!  Kind of like pumpkin pie spice, but so much better than any pumpkin pie spice Ive ever had.  If you’re making any kind of cinnamon-spiced pies ~ apple, pumpkin, etc. ~ GO BUY SOME NOW!!!  Trust me, youll be so glad you did) but after considering the fact that my father-in-law is allergic to walnuts I decided to leave out the pecans.  No, hes not allergic to pecans, but they look so much like walnuts I didnt want to put him off the sweet potatoes.  (Hey, I needed to be sure someone would eat them so I didnt have to bring them home!) Then I baked it but after pulling it out of the oven I turned on the broiler and dumped marshmallows all over the top.  Then I stuck it under the broiler until the marshmallows started to puff up and brown.  Mmm, it looked lovely and got rave reviews from my father-in-law and his sister.  I have to admit I tasted some of Littlests (who insisted he have some when he saw the marshmallows, but refused to eat it once I made the mistake of telling him it was sweet potatoes) and was almost tempted to eat a serving myself.  I’m seriously thinking of using this recipe to make my family a pumpkin pie.

So that was my Thanksgiving ~ pretty much.  But I want to hear from you.  What did you make for Thanksgiving?  Was it something you were assigned or were you in charge of your own feast this year?  Did you stick to tried and true recipes or did you try something new?

22 October 2011

bread talk part III ~ rockin' rye


“Here is bread, which strengthens man’s heart, and therefore is called the staff of Life.” -Matthew Henry
You really have to taste this bread to understand how flavorful and SOFT it is.  Mmmm, rye.
Have I mentioned before how much I love bread.  I LOVE bread.  Just thinking about it makes me drool like Homer Simpson.  And have I mentioned (I have, just wanted to see if you were paying attention; were you paying attention?) that I can now bake bread?  It’s such a novelty for me to have my bread rise correctly and come out of the oven smelling warm and homey and delicious that I’m still very excited about it.  All kudos go to my rock star friend Chef Tess, who prodded and nudged first indirectly through her awesome blog and then personally through classes and e-mails and unending praise and encouragement.  Love you Steph, you totally ROCK!  MUAH!!!

So since I can accept no credit or glory for my own personal bread triumphs, I am not posting the recipe for my amazingly perfect bread.  Please follow this link to experience your own personal bread journey, guided by the sweet and witty Chef Tess.  (If youre new to breadmaking, or simply not happy with how your bread is turning out, you will want to start here.)  Mmm, homemade rye bread.  It’s (almost) better than a trip to Disneyland.

20 September 2011

Bread Talk Revisited

Guess what, guess what?!?!?!  I made bread!!!!!  Can you believe it?  I made freshly ground whole wheat (kamut even) bread.  And not only did I make bread, but I made perfect bread!  (Well, perfect for me, and pretty darn perfect for anyone who’s asking.)  I made bread that rose (rised?)  I made bread that was soft and luscious.  I made bread with an awesome crumb.  I made bread with nary a bubble.  I made bread!!!!!

Normally I would give you the recipe, but this was bread of the gods, and so only a bread goddess (or a bread rock star) is worthy of this recipe.  I stole it from her anyway, so I’m giving her complete and total credit.  In fact, really the only reason my bread turned out (and the only reason I was willing to try again if truth be told) was because she took the time to help me trouble shoot.  (She totally read my blog, asked questions, read my explanations, and then told me what I was doing wrong and what to do to fix it.  If I haven't said it yet, Stephanie, YOU ROCK!)  So if you want to participate in your own totally amazing bread nirvana, click here and check out Chef Tess Bakeress.  And while you’re there, check out the billion other amazing recipes on there.  And then, if possible, go to a class she’s giving and learn from her live and in person.

LOVE YOU STEPHANIE!

In the meantime, check out my amazingly incredibly awesomely deliciously perfect bread.  And then, if youre in the neighborhood, stop by and try some with my sister-in-laws homemade blackberry jam.  Mmmm, bread heaven!

 No, its not actually perfect.  I do need to work on my loaf technique.

And since my bread doesnt usually like to rise, I put it in the pans and then put something else in the oven to bake.  Imagine my surprise to find that my bread was rising perfectly, and then over-rising, since I couldnt take what was in the oven out.  It rose right out of the pan!  I baked it anyway and refuse to regret it.

05 August 2011

Bread Talk

Let’s talk bread.  I love bread.  Fat bread, skinny bread; loaf bread, roll bread; sweet bread, sour bread; white fluffy bread, dense grainy bread – there’s nary a bread that I don’t adore.  I have found what seem to be some amazing bread recipes.  I have one for zucchini bread that totally rocks.  But it seems like every time I try to bake a yeasty bread, instead of a loaf I end up with a lump.  I don’t know if it’s our climate (dry) or our altitude (high) or if I just don’t love the dough.  (My mom is a firm believer that bread is alive – maybe because of the yeast – and that it can feel the love while you’re kneading.  If you love the bread you’ll love the bread.)

Several years ago I inherited a bread maker.  I was in heaven and tried every recipe I could lay hands on.  Some turned out ok, but many weren’t all that great.  If I left them in the machine and let them bake themselves they seemed to turn out ok, although sometimes the ingredients would fail to mix well and I’d end up with a floury brick.  And it was not much help at all when I wanted to make rolls - I could never get them to rise.

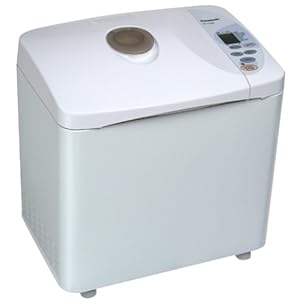
I guess my husband got tired of listening to me complain, because for Mother’s Day I opened up this little beauty.


I actually wanted one of those bread makers that make a traditionally shaped loaf, but they have mixed reviews – parts break and are difficult to replace – and my husband is nothing if not a believer in customer reviews.  Let's get one thing strait though, I am not complaining.  I’ve had a blast breaking my new machine in and so far everything has turned out swimmingly.  That has everything to do with this being an awesome machine and nothing to do with the fact I have found an amazing bread machine recipe that the whole family loves and haven’t really tried much else.  (I’m still pretty scared of bread.  But I am going to a class tomorrow taught by bread rock star, Chef Tess.  Here is her blogsite, you should absolutely go check it out.  Chef Tess  And I get to go with my bff.  Love you sweetie!  Can’t wait to spend the afternoon together.  Thanks for being my friend and my number one blog fan.  I know you're reading.  You may even be the only one.  xoxoxo)

In the meantime, I’ll share with you my best bread machine and family sandwich staple recipe.  I have no idea who Mimi is (I found this searching somewhere online) but I am forever grateful to her for coming up with this recipe and sharing it where I could find it.  If you like English muffins this is the bread for you.  Crunchy/crusty on the outside, soft and fluffy on the inside and filled with whole-grain goodness that you can completely miss if you’re not paying attention.  Mmm.

Since I’m such a fanatic follower of Chef Tess (and even though she's so amazing she intimidates me, I really will pluck up the courage to try more of her recipes) I took her advise and dusted off my electric grinder in order to mill my own cornmeal.  Here are my two best bread friends.


And my freshly-ground cornmeal.

 Isn’t it golden and beautiful?

When I was doing some research once trying to figure out how to stop baking bricks, I also bought some actual bread flour.  It has more gluten than all-purpose flour and is supposed to help your bread rise better.  If you don’t have bread flour, you can purchase gluten in the flour aisle and add a little to your bread.  It seems to have helped mine.

Ok, on to the recipe:

Mimi’s Cornmeal English Muffin Bread
Large Loaf:
1½ cups water
1 large egg
1-1/3 tablespoons sugar
1 teaspoon salt
1 cup yellow cornmeal
3 cups bread flour
2½ teaspoons regular dry yeast

Medium Loaf:
1 1/8 cups water
1 small egg
1 tablespoon sugar
¾ teaspoon salt
¾ cup yellow cornmeal
2¼ cups bread flour
2 teaspoons regular dry yeast

Put in your breadmaker according to manufacturers instructions.  Set to Medium crust.  Cool on rack.

Easy peasy lemon squeezy.  And sooooooo yummy smeared with melty butter when it’s hot and crusty.  Yumm.

See how the crust crumbles when you cut it and how soft the center is?  Just think of that crumbly soft goodness in your mouth.  I can't begin to describe how delish this bread is.
You really have to try it.
Go. Bake. Now.
Plus, with this unlimited time offer you get a bonus recipe!  A lovely sandwich I made (yep, “adapted” again below to meet my exacting standards) with my yummy homemade bread.  (I still count it as homemade - even if it was all done by a machine, it was made in my home!)

Barbecue Style Grilled Cheese
makes 2
4 thick-cut white bread slices (Texas toast)
2 slices cheese
4 slices bacon, cooked
1 tomato, cut into 4 slices
6 thin slices avocado
2 teaspoons butter, softened
2 tablespoons Miracle Whip
2 tablespoons salsa

Heat greased grill to medium-low heat.

Fill bread slices with cheese, bacon, tomatoes and avocados to make 2 sandwiches.  Spread outsides of sandwiches with butter.

Grill with lid closed 4 to 6 minutes or until cheese is melted and bread is grill marked, turning once.

Meanwhile, mix Miracle Whip and salsa.  Serve as a dip for sandwiches.

Here’s what I did:  Spread your favorite barbeque sauce on a slice of thick bread.  Add a slice of your favorite cheese (I used cheddar).  Top with 2-4 slices of bacon, or sprinkle with bacon bits.  Add another slice of cheese.  Microwave for 10-20 seconds, until cheese is soft but not completely melted.  (This insures that the cheese is nice and melty after grilling.  Yum!)  Place tomato slices and lettuce on top of cheese.  (You can wait and do this part after grilling if you prefer your tomato and lettuce cool.)

Butter another slice of bread and carefully spread the other side with barbeque sauce.  Place on sandwich, butter to the outside.  Carefully invert so that the butter side lies on a spatula or cookie turner.  Gently butter the outside of the other piece of bread.  (This should be fairly easy, since this slice should still be warm from the microwave.  Make sure your butter is softened – it makes buttering bread so much easier.)  Lay the sandwich on your grill as indicated above, or use a hot griddle or fry pan, turning when bread becomes golden brown.  (Be careful when turning that you don’t flip your veggies out of the sandwich.)

Here’s the way my family ordered.  (I felt just like a special-order fry cook.  Their own personal SpongeBob Squarepants.)

Littlest: just bacon and cheese
Middlest: just cheese (he’s a total grilled cheese freak and orders it every time we eat out.
And it was Festivus for the rest of us (thanks Jerry Seinfeld!) with varying levels of barbeque sauce.  My oldest raved and my husband even requested a specially-made second sandwich.  Nothing but crumby plates when dinner was over.  This is definitely going into our favorites file.

It’s not particularly pretty, but it looks great on a festive paper plate (hey, it was grill night - and apparently poet night too!) and it sure tasted good.  Add a bowl of tomato soup or pasta and potato salad and you're ready for a party!