“Since hunger is the most primitive and permanent of human wants, men always want to eat, but since their wish not to be a mere animal is also profound, they have always attended with special care to the manners which conceal the fact that at the table we are animals feeding.” - John Erskine

27 August 2011

The Animal’s Version of Zatarain’s Jambalaya

Hey, its two for one day!  I told you I would share my jambalaya recipe and here it is.  This one is very easy, and at least two of the animals go wild for it.  (My littlest and middlest don’t really like the spice, even though I try to tone it down as much as possible.  I let them eat Spaghetti O’s on jambalaya night.)
 

Take a box of this.  We usually buy the family size (and then I often double it so we can have some leftovers.  My oldest likes it cold in his lunchbox at school) so Im giving you the amounts for that.  If you want to make the smaller size youll have to figure out the ratios on your own.  Basically you’re going to follow the instructions for making jambalaya from the back, with a few modifications. 

The Animal’s Version of Zatarain’s Jambalaya
1 family size box Zatarain’s New Orlean’s style Jambalaya Mix (make sure to get the one with rice – I’m not sure these instructions work with the noodle kind)
1 to 1½ pounds kielbasa (we use polish sausage or kielbasa, but you can use just about anything – sausage, chicken, ham, shrimp, or a mixture of any or all of these) 
4 cups water 
½ cup V-8 (the original tomato-based vegetable variety.  I wouldn’t use the spicy kind unless you’re really into spciy)
2 tablespoons vegetable or olive oil (optional – don’t use this if you’re using sausage or other meat with a high fat content)
½ cup white rice (any varity – this is our favorite)

Cut meat into bite-sized pieces.

In a 2½ quart saucepan, combine water, V-8 and oil (if using) and bring to a boil.  Add Zatarains mix, rice and meat; return to a boil.

Reduce heat, stir, cover and simmer for 25 minutes or until most of the water has been absorbed.  Remove from the heat and let stand 5 minutes.  Stir and serve.

Very easy, only 1 pan to wash.  Serve with mixed veggies or a salad and the only thing you’ve had to work at is cutting up the meat.  Hey, you made dinner.  Way to go!

Italian Pasta Casserole


I think we all have a favorite copy of this recipe, but just in case, I’m sharing this one.  Its a nice fallback when you dont know what to make for dinner, its easy to make, satisfying and tastes great.  So here’s the unadulterated recipe.  (As usual, my changes are below.)

Italian Pasta Casserole
serves 6
2 cups uncooked spiral pasta
½ pound lean ground beef
½ pound Italian turkey sausage links, casings removed
1 small onion, finely chopped
1 garlic clove, minced
2 cans (14½ ounces each) diced tomatoes, undrained
1/3 cup tomato paste
¾ teaspoon Italian seasoning
½ teaspoon chili powder
¼ teaspoon dried oregano
1/8 teaspoon salt
1/8 teaspoon garlic powder
1/8 teaspoon dried thyme
1/8 teaspoon pepper
2 ounces sliced turkey pepperoni
1 cup (4 ounces) shredded part-skim mozzarella cheese

Cook pasta according to package directions.  Meanwhile, crumble beef and sausage into a large skillet; add onion and garlic.  Cook and stir over medium heat until meat is no longer pink; drain.  Stir in the tomatoes, tomato paste and seasonings.  Bring to a boil.  Reduce heat; simmer, uncovered, for 5 minutes.

Drain pasta; stir in meat mixture and pepperoni.  Transfer half of pasta mixture to a 2-quart baking dish coated with cooking spray.  Sprinkle with half of cheese; repeat layers. 

Cover and bake at 350° for 20-25 minutes or until bubbly.

Instead of the turkey sausage links I used regular old Jimmy Deans.  Didn’t have to bother with the casings, and I had already used my turkey sausage for Jambalaya.  Theres a low-fat version too, if youre trying to eat healthier.  Since I was doubling the recipe, it made it simple with 1 pound ground beef and 1 pound sausage.  I left out the pepperoni too.  Seemed like overkill to me (my husband agreed) but if you want to try it that way, go for it.  Let me know how it tastes. 

This was pretty yummy, but I think I’m getting a little tired of Italian.  My husband could eat it every night, but I’m ready for a change.  Maybe I’ll share my easy peasy jambalaya recipe with you...

26 August 2011

Spinach Lasagna Roll-Ups

If you’re a fan of manicotti – and my husband totally adores manicotti – but don’t want to try to stuff those stupid manicotti shells (I really don’t like stuffing manicotti shells!) then this is the recipe for you.  All the flavor and cheese-stuffed pasta-goodness of manicotti without the pain in the neck of stuffing!  And, as an added bonus, spinach – some of the best stuff there is for you!  (Do I sound like a commercial yet?  Of all the recipes I’ve tried for this blog so far, I think this is my fave.)  So without further fanfare, here it is:
 
Spinach Lasagna Roll-Ups
serves 4
8 no-boil lasagna noodles
I tablespoon olive oil
2 garlic cloves, minced
5 ounces washed baby spinach (or 8 ounces frozen spinach leaves, thawed and squeezed dry)
1½ cups shredded part-skim mozzarella, divided
1 cup part-skim ricotta
½ cup freshly grated parmesan, cheese, divided
1 large egg
¼ teaspoon freshly grated nutmeg
¼ teaspoon freshly ground pepper
2 to 3 cups tomato sauce

Preheat oven to 375°.

Place noodles and enough water to cover in a 2-quart microwave-safe, ovenproof casserole dish.  Cover and microwave on high until noodles are softened, about 4 minutes.  Drain off water and arrange noodles on a plate to cool.  Dry casserole dish.

Meanwhile, heat oil in a large non-stick skillet.  Add garlic and sauté until fragrant, 30 seconds.  Add spinach and 1 tablespoon water, then stir to coat leaves and cover pan.  Cook, shaking pan occasionally, until wilted, about 1 minute.  Spread cooked spinach out on a cutting board to cool, then finely chop.

In a medium bowl, combine 1 cup of the mozzarella, ricotta, ¼ cup of the parmesan cheese, egg, nutmeg, and pepper.  Stir in cooled spinach mixture.  Spread 1 cup of the tomato sauce in bottom of casserole.  Place ¼ cup of the cheese and spinach mixture at base of each noodle and roll up.  Place rolls seam-side down in casserole; pour remaining sauce over rolls.  Sprinkle with remaining mozzarella and parmesan.  Cover with foil and bake 25 minutes.  Uncover, and bake until cheese bubbles, 5 to 10 minutes more.  Let stand 5 minutes before serving.

Easy easy easy.  And yummy yummy yummy!  I even used fresh spinach, are you impressed?  (Ok, it had started to wilt in my crisper, but I figure it was just going to get wiltier.)  And can you believe it, I actually followed the recipe this time!  Well, almost.  I used spaghetti sauce instead of tomato sauce.  (My husband has declared that this is his favorite.)  And I didn’t measure out the mozzarella when putting it on top, but I’m fairly sure I used more than was called for.  I just sprinkle until it looks good.  Did the same with the parm.  Other than that, I really did follow the recipe.

One thing I will do next time though – my noodles got very sticky just sitting there on the plate.  I would probably keep them in cool water and just pat them dry with a clean dish towel or a paper towel when I was ready to roll.  Still, I am definitely making this one again.  This was not only my favorite recipe to date, but everyone ate it – even my tomato-hater – and NO ONE complained.  How’s that for a perfect dinner?
 

24 August 2011

Nancy’s Family Favorite Meatballs and Cherry Delight

Life in our house this past week has been a crazy mad rush.  School started and we took a weekend trip with family.  Throw in a birthday, several doctor’s appointments (for several family members), haircuts, lunch with friends and a much-needed pedicure and dinner this week looked an awful lot like this:

Still, since it was my husband’s 45th birthday, and since his mom died a couple years back, I decided to celebrate him by making his favorite foods: his mom’s meatballs and Cherry Delight.  No cake, just Cherry Delight.  It’s what he wants every birthday.  Hard to put candles on, but hey.  Can I just say, I really really  really really hate making meatballs.  The only good way to mix up meatballs or meatloaf is to get your hands in there and get squishy.  Kind of similar to a mud pie!  Meatloaf I can handle because you just end up plopping all that squishy goodness in a bread pan and you’re good to go.  But meatballs... They require standing, rolling, plopping, washing cookie sheets...  All of that is just NOT my bag baby.  (Sorry Austin Powers.)  Still, the hub only turns 45 once, and I like to think his mom was right there with me and my oldest as we rolled and plopped.  It was actually kind of fun.

Now I’m going to admit something horrible.  This is a huge secret, so please try to keep it to yourself.  I hate hate hate making Cherry Delight too.  Not quite, but almost more than meatballs.  There has even been a birthday or two where I clearly intended on making it but procrastinated for so long that I finally just gave up.  When my husband’s mom was still here she took care of these things for me.  All I had to do was stop by Baskin Robins for the ice cream cake.  (Yes, he does like cake, and it made me feel like I was doing my part.)  I really miss her when birthdays come around.  Ok, maybe my reasons are a little more selfish than I like, but they are no less heartfelt.  Cherry Delight is a very simple dish – no baking, all you have to do is melt the marshmallows.  And maybe that’s the kicker for me.  I hate making Rice Krispy treats too...

My husband’s mom was great at making meatballs and Cherry Delight every birthday and letting me get away with buying the cake.  She even gave me a gallon freezer bag full of her meatballs not too long before she died.  It was a nice surprise to pull them out on his next birthday and give him a little taste of his mom’s cooking.  Maybe one of the reasons I hate making her meatballs so badly is because I’ve never managed to get them right.  The first time I tried he told me that they just didn’t taste like hers.  Ok, I hate onions (have we established that sufficiently yet?) so I left that part out, but I poured in a generous amount of onion powder!  The next time I made them, I added the onions (and ate cold cereal that night), but they weren’t chopped right.  Can you understand why I finally gave up and started serving him these?  So this year, when he caught my oldest and I plopping meatballs (we really wanted it to be a surprise, but they took longer to make than we had planned and he walked in on us mid-plop) I warned him that if he complained even a little bit it would be the last time I would ever make his mothers meatballs.  (Yeah, right.  Only consolation for me was that my oldest said it was fun making meatballs.  So I’m passing the meatball baton.  Hooray!)  And good man, there were no complaints to be heard.  Maybe that was because his mother was there guiding me and my oldest this time...?  Anyway, here’s the recipe.  Followed it as truly as I possibly could.

Nancys Family Favorite Meatballs

2 pounds ground beef
1 onion, chopped fine
1 cup tomato sauce
1 cup bread crumbs
¼ teaspoon sage
¼ teaspoon salt
¼ teaspoon pepper
2 eggs
dry pancake mix or Bisquick

Mix all ingredients thoroughly.  Form into balls approximately the size of a 50 cent piece.  Roll in pancake mix.

Bake at 400° for 15 minutes on an ungreased cookie sheet.  Use immediately or freeze for up to 1 month.

To serve in sauce, place desired amount in a 9x13” baking pan.  Cover with cream of mushroom soup mixed with water.  Cover and bake at 350° for 25 minutes.


My mother-in-law always made these with cream of mushroom soup and water.  Before I met her I didn’t even know you could make cream of mushroom soup with water, let alone that anyone actually would.  (We always made it with milk.  Cream of mushroom soup, right?)  It actually says you can use water on the back of the can!  (Ever read the back of a soup can?  I hadn’t either.  Who doesn’t know how to make soup?  Kind of like reading the back of a shampoo bottle.  And sorry if I’ve offended anyone who actually had to read the back of a soup can.  Or a shampoo bottle.)  So whenever making meatballs for my husband I use cream of mushroom soup and water.  But you can also heat them up in spaghetti sauce, bbq sauce, whatever kind of sauce you like, or eat them dry.  (Caught my oldest popping a couple that fell on the floor into his mouth rather than into the garbage can.  I just looked the other way and tried to tamp down on my germaphobia.)

And since it was part of the birthday feast (even though I didn’t actually get it made until the next day) here’s the recipe for dessert.

Cherry Delight

18 large graham crackers
1 square melted butter
4 tablespoons powdered sugar
24 large marshmallows or 3 full cups small marshmallows or 13 ounces marshmallow creme
½ cup milk
1 package Dream Whip
2 cans pie cherries

Mix together graham crackers, butter and powdered sugar.  Set aside.

Melt marshmallows in milk over low heat. Allow to cool and add Dream Whip.

Push graham cracker mixture into bottom of flat pan.  Layer with cherries and top with marshmallow mixture.

Chill.

Ive seen this with the cherries on top, but this is the layering order my husband likes best, with a little of the graham cracker mix sprinkled on top.  Anyway you layer it, it’s pretty good.  I also tried Cool Whip instead of Dream Whip once.  It does not work! - too thick or something.  Stick to the Dream Whip.
 
Hope you enjoy!

15 August 2011

Crock Pot Cabbage Rolls

Have to admit, I kiped the picture for this one off the internet – couldn’t find my camera and by the time I did they were long gone.  My cabbage rolls looked a lot like this, only I think I rolled them a little more tightly.  (Try slitting up the stem about half an inch, it makes rolling a lot easier.)  And I think the recipe is the same, or pretty close.  Heres the link.  (Couldnt figure out how to link the pic...)

This is a great recipe for those days when you know you’re going to be pressed for time, or for when it’s too hot to turn the oven on.  (Hope you’re paying attention Renée!  I chose this recipe just for you!)  But you do need to prepare ahead.  They take 8-10 hours to cook.  Here’s the recipe.

Crock Pot Cabbage Rolls
12 large cabbage leaves
1 pound lean ground beef
½ cup cooked rice
1 (6-oz) can tomato paste
¾ cup water
½ teaspoon salt
1/8 teaspoon pepper
¼ teaspoon thyme
¼ teaspoon nutmeg
¼ teaspoon cinnamon

Wash cabbage leaves.  Boil 4 cups of water.  Turn off heat.  Soak leaves in water for 5 minutes.  Remove, drain and cool.

Combine ground beef, rice, salt pepper, thyme, nutmeg and cinnamon.  Place 2 tablespoons meat mixture on each leaf and roll firmly.  Stack in crock pot.

Combine tomato paste and water, pour over stuffed cabbage.  Cover.  Cook on low for 8-10 hours.


I really did follow this recipe almost exactly.  Really.  Hey, Im capable of following a recipe!  I started by cooking the rice, since it takes a good 45 minutes for my favorite.  Texmati Brown Rice.  If you haven’t tried – or haven’t liked – brown rice or are just looking for a yummy alternative, I highly recommend this one.  It is so yum!  And it makes your house smell like popcorn while it’s cooking.  No joke, popcorn.  Try it and see.  I’ve had a hard time finding this in Wal-Mart lately, but my mom said she saw some at Smith’s.  I’ll have to go look.  Since our altitude is so high – and I like sticky rice – I always add an extra ¼-½ cup water and a pat of butter to keep it from sticking to my pot.  (I have a rice cooker but I cant stand to clean it and I never like how my rice turns out in it.  If you like it that way, go for it.  Me, Im happy using a pot with a good tight lid.)

Next I washed a head of cabbage fresh from my parents’ garden.  Everything seems to taste better from your own (or your own parents’) garden.  Second to that is my sister-in-law’s farm.  Mmm, fresh veggies.  I could have done without the nest of newly hatched earwigs though.  Ew!  Had 4-6 “baby” earwigs crawl out of the leaves as I was washing.  Not quite grown up but big enough to be creepy.  Quick trip to a party in my disposal for the little bug-ers (pun intended, hehe) but I was freaked out waiting to find another one with each new leaf I pulled off.  Felt creepy crawly all day.

While the cabbage was steaming, I mixed up the filling.  No need to cook the ground beef, it cooks up in the crock pot.  I did a whoopsie though – mixed up my water and tomato paste into the filling.  I made up some extra to pour over the top, but the extra moisture made the filling kind of mealy in my opinion.  Husband and kidlets didn’t complain, but I think I’ll try it the right way next time.  And here’s where I made the change.  Yes, I admit it, I didn’t follow the recipe AGAIN.   Just couldn’t stand the thought of cinnamon in my cabbage rolls.  I was willing to tolerate the nutmeg, since a chef I know recently told me that nutmeg is a secret ingredient in the best potato casseroles, but belongs in sweet breads and cookies in my opinion and my brain didn’t feel like bending on that subject.  I couldn’t reach the nutmeg in my cupboard and didn’t want to have to drag out the step stool so I settled for my old stand-by, season salt.  And onion powder.  Figured I had to replace the flavor somehow.  Tasted pretty good.  (Am I being too predictable?  After all, the point of this project was to try new things... Ok, I promise to be more adventurous next time.)

I made these a day ahead, put them in my crock and put it in the fridge.  Next morning all I had to do was pop it on the warmer and turn it on.  Warm filling meal with no added oven heat.  Big hit with the fam, and this is a one pot meal – meat, vegetables, rice, all in one pot!  How sweet is that?  Of course, the animals were crying for food again in 2 hours, but what else is new?  Next time maybe I should make a hot batch of rolls or some cornbread to go with them, although that would mean turning the oven on.  Quick trip to the bakery...?

13 August 2011

Creamy Seafood Stuffed Shells

Is it strange that I’ve never made stuffed shells.  Ever.  I did make manicotti once and it was a pain, so I haven’t been very excited about doing anything similar.  I have to say shells are quite easy and not too much trouble.  I even stayed pretty close to the recipe this time.  See what you think. 

Creamy Seafood Stuffed Shells
serves 8
24 uncooked jumbo pasta shells
1 tablespoon finely chopped green pepper
1 tablespoon chopped red onion
1 teaspoon plus ¼ cup butter, divided
2 cans (6 ounces each) lump crabmeat, drained
1 package (5 ounces) frozen cooked salad shrimp, thawed
1 egg, lightly beaten
½ cup shredded part-skim mozzarella cheese
¼ cup mayonnaise
2 tablespoons plus 4 cups milk, divided
1½ teaspoons seafood seasoning, divided
¼ teaspoon pepper
¼ cup all-purpose flour
¼ teaspoon coarsely ground pepper
1½ cups grated Parmesan cheese

Cook pasta according to package directions.  Meanwhile, in a small skillet, sauté green pepper and onion in 1 teaspoon butter until tender; set aside.

In a large bowl, combine the crab, shrimp, egg, mozzarella cheese, mayonnaise, 2 tablespoons milk, 1 teaspoon seafood seasoning, pepper and green pepper mixture.

Drain and rinse pasta; stuff each shell with 1 rounded tablespoon of seafood mixture.  Place in a greased 13x9-inch baking dish.

In a small saucepan, melt remaining butter over medium heat.  Whisk in flour and coarsely ground pepper; gradually whisk in remaining milk.  Bring to a boil; cook and stir for 2 minutes or until thickened.  Stir in Parmesan cheese.

Pour over stuffed shells.  Sprinkle with remaining seafood seasoning.  Bake, uncovered, at 350° for 30-35 minutes or until bubbly.

So, of course, I didn’t add the onions.  Or the green peppers.  No one here – with the possible exception of my oldest – likes peppers, so I skipped the whole skillet thing altogether and just added a little onion powder to the seafood mixture.  I also tried some whipped cream cheese instead of the mayo.  Didn’t think it would make that much difference in the creaminess, plus it would add a little more cheesiness.  And I used refrigerated crab meat – the imitation kind that’s still made with real fish.  Looks like this, only this says it’s real crab.  Aquamar Crab Meat  It was WAY cheaper than the canned stuff.  And, although I bought frozen shrimp, I forgot to thaw it so I just popped open a can.  (I keep them around for a yummy snack – I’ll have to share that one of these days...)  Stuck to the recipe other than that.  hahahaha!

This was a big hit.  We’re pasta fans around here, and I adore seafood, so it went over very well.  The cheese sauce was particularly yum, made again with my parmesan blend from Sam’s.  Bella Collina 4 cheese blend  Here it is, hot and bubbly just out of the oven.  (Looks a lot like the poisson florentine.  And yes, my stovetop is clean, very clean, no unwiped toast crumbs there, it must be spots on your glasses, uh, contact lenses, uh, eyes.  Yeah that's it.)

And paired with a simple lettuce salad.
Mmm, cheesy pasta goodness!

I also want to give a shout out to Two Peas and Their Pod for dessert, Twix Caramel Brownies!  If youre a fan of chocolate and caramel these brownies are to die for.  I crunched up the Twix bars using my handy mini-food processor (find one at Wal-mart here).  Reasonably inexpensive and I end up using it lots more than I do my big one.  Its the perfect size for making bread or cracker crumbs, or crunching up Oreos, candy and all sorts of other things.  Lots easier to clean too.

I had no caramel ice cream sauce in my house either (thought I did, darn it!) but I did have a bag of these so I tossed in a handful with the Twix chunks.  Yum!  You HAVE to try these!

11 August 2011

Southwestern BLT Taco Salad

I haven’t been blogging for a couple of days.  I wasn't feeling all that well, plus there was the stress of getting 3 kidlets ready for school and a furious wrestling match with a batch of bread dough – I lost that battle, I’m afraid, but live and learn.  (Havent decided if I really want to post that story... Maybe I'll save it for after I win a bread battle.) 

Anyway, I’ve discovered something about myself since beginning this blog: most of the time I don’t follow the recipe.  (Any of you find that surprising?  I feel like I should have figured that out sooner.  Maybe I'm more like my husband than I thought...)  More often than not I catch myself using my new recipes to remind me of other stuff we’ve eaten before that we liked.  Or as a jumping off point to using items I have on hand or things that I think sound more tasty.  That said, here’s today’s recipe.  (The somewhat similar take I made of it follows.)

Southwestern BLT Taco Salad
serves 4
1 pound lean ground beef
1 package taco seasoning mix
2/3 cup water
½ cup southwest ranch sour cream dip*
½ cup salsa
½ cup chopped precooked bacon
1 can (2¼ oz) sliced ripe olives, drained
4 Roma tomatoes, each cut into 8 pieces
10 ounces romaine lettuce
1 cup shredded Cheddar cheese (4 oz)
1 cup chili cheese-flavored corn chips

In 10-inch skillet, cook beef over medium-high heat 5 to 7 minutes, stirring occasionally, until thoroughly cooked; drain.  Stir in taco seasoning mix and water.  Reduce heat to medium.  Cook uncovered 2 to 4 minutes, stirring occasionally, until most of liquid is absorbed.

In large bowl, mix sour cream dip and salsa.  Stir in beef mixture, bacon and olives.  Gently fold in tomatoes and lettuce.

Divide salad among 4 individual plates.  Sprinkle with cheese and chips.  Serve immediately.

*In place of the southwest ranch sour cream dip, use ½ cup of sour cream mixed with 1 to 2 teaspoons taco seasoning mix.

When I reread this recipe prior to making it, I realized that adding bacon and ground beef to a salad just didn’t sound all that great to me.  And southwestern bacon just sounded ick.  Now I don’t mind taco salad (quite like it actually, unless it's at Taco Bell they’re just too spicy for my delicate palate) but bacon tacos just didn’t seem right.  (Can’t get myself to try a fish taco either, despite having been told by several people how good they are.)  Anyway, I thought this salad sounded like a great jumping off point for our favorite taco salad. 

I first experienced the deliciousness and ease of taco salad at a college party thrown by my friend Dawn.  Basically they (Dawn and her roommate) took a giant bowl and filled it with all of their favorite taco ingredients, emphasis on the lettuce.  The fancy dressing was nothing more than sour cream, which mixes nicely with the taco seasoning and balances out those spicier elements.  They topped it with crunched up tortilla chips.  It was awesome and I make it from time to time when I have lettuce that needs to be used up or tortilla chip crumbs that no one wants to eat.  I did switch it up a bit though.  Usually I use ground beef, but I had some left over chicken so I shredded that and added taco seasoning and a can of tomato sauce.  (My husband likes his food saucy and has insisted that all tacos made in our house are made using a can of tomato sauce instead of water.  Works for me and it’s one of the only ways I can get tomatoes into my middlest.) 

So here’s my recipe.
(I'll add a picture as soon as I remember where I put my camera...)

M’s Chicken Taco Salad
serves a family of 5 voracious eaters
1 pound cooked chicken, shredded (easy way to do this is pulling the meat apart with 2 forks) and cooled
1 package (¼ cup) taco seasoning mix
one 14.5 oz. can tomato sauce
12 ounces romaine or other dark green leaf lettuce
shredded cheese and other favorite taco toppings (tomatoes, onions, black olives, avocados, etc.), to taste
½-1 cup sour cream (again to taste)
2 cups crushed tortilla chips

In a large serving bowl, mix taco seasoning with tomato sauce.  Stir in chicken and mix well.  Add lettuce, cheese and taco toppings; toss.  Gently mix in sour cream.  Top with tortilla chips just before serving.  Serve cold.

Can I just say, yum!  Big hit with all the fam, and each member has the option of leaving out the ingredients they like or don’t like.  (No onions for me, no tomatoes for middlest, happy happy family.)  It’s great for days you just don’t feel like cooking, as there’s nothing to cook but the chicken, which can be done ahead or reused from leftovers.  And as my friend Dawn showed me, this can be easily adapted to feed a crowd.

Hope you take the opportunity to give this one a try, whether using the original recipe or my version.  And with any of these recipes you try, I'd love to know what you think!

05 August 2011

Bread Talk

Let’s talk bread.  I love bread.  Fat bread, skinny bread; loaf bread, roll bread; sweet bread, sour bread; white fluffy bread, dense grainy bread – there’s nary a bread that I don’t adore.  I have found what seem to be some amazing bread recipes.  I have one for zucchini bread that totally rocks.  But it seems like every time I try to bake a yeasty bread, instead of a loaf I end up with a lump.  I don’t know if it’s our climate (dry) or our altitude (high) or if I just don’t love the dough.  (My mom is a firm believer that bread is alive – maybe because of the yeast – and that it can feel the love while you’re kneading.  If you love the bread you’ll love the bread.)

Several years ago I inherited a bread maker.  I was in heaven and tried every recipe I could lay hands on.  Some turned out ok, but many weren’t all that great.  If I left them in the machine and let them bake themselves they seemed to turn out ok, although sometimes the ingredients would fail to mix well and I’d end up with a floury brick.  And it was not much help at all when I wanted to make rolls - I could never get them to rise.

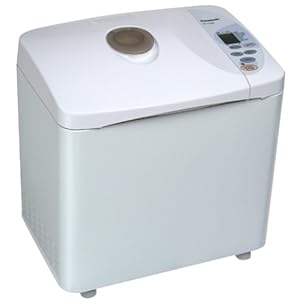
I guess my husband got tired of listening to me complain, because for Mother’s Day I opened up this little beauty.


I actually wanted one of those bread makers that make a traditionally shaped loaf, but they have mixed reviews – parts break and are difficult to replace – and my husband is nothing if not a believer in customer reviews.  Let's get one thing strait though, I am not complaining.  I’ve had a blast breaking my new machine in and so far everything has turned out swimmingly.  That has everything to do with this being an awesome machine and nothing to do with the fact I have found an amazing bread machine recipe that the whole family loves and haven’t really tried much else.  (I’m still pretty scared of bread.  But I am going to a class tomorrow taught by bread rock star, Chef Tess.  Here is her blogsite, you should absolutely go check it out.  Chef Tess  And I get to go with my bff.  Love you sweetie!  Can’t wait to spend the afternoon together.  Thanks for being my friend and my number one blog fan.  I know you're reading.  You may even be the only one.  xoxoxo)

In the meantime, I’ll share with you my best bread machine and family sandwich staple recipe.  I have no idea who Mimi is (I found this searching somewhere online) but I am forever grateful to her for coming up with this recipe and sharing it where I could find it.  If you like English muffins this is the bread for you.  Crunchy/crusty on the outside, soft and fluffy on the inside and filled with whole-grain goodness that you can completely miss if you’re not paying attention.  Mmm.

Since I’m such a fanatic follower of Chef Tess (and even though she's so amazing she intimidates me, I really will pluck up the courage to try more of her recipes) I took her advise and dusted off my electric grinder in order to mill my own cornmeal.  Here are my two best bread friends.


And my freshly-ground cornmeal.

 Isn’t it golden and beautiful?

When I was doing some research once trying to figure out how to stop baking bricks, I also bought some actual bread flour.  It has more gluten than all-purpose flour and is supposed to help your bread rise better.  If you don’t have bread flour, you can purchase gluten in the flour aisle and add a little to your bread.  It seems to have helped mine.

Ok, on to the recipe:

Mimi’s Cornmeal English Muffin Bread
Large Loaf:
1½ cups water
1 large egg
1-1/3 tablespoons sugar
1 teaspoon salt
1 cup yellow cornmeal
3 cups bread flour
2½ teaspoons regular dry yeast

Medium Loaf:
1 1/8 cups water
1 small egg
1 tablespoon sugar
¾ teaspoon salt
¾ cup yellow cornmeal
2¼ cups bread flour
2 teaspoons regular dry yeast

Put in your breadmaker according to manufacturers instructions.  Set to Medium crust.  Cool on rack.

Easy peasy lemon squeezy.  And sooooooo yummy smeared with melty butter when it’s hot and crusty.  Yumm.

See how the crust crumbles when you cut it and how soft the center is?  Just think of that crumbly soft goodness in your mouth.  I can't begin to describe how delish this bread is.
You really have to try it.
Go. Bake. Now.
Plus, with this unlimited time offer you get a bonus recipe!  A lovely sandwich I made (yep, “adapted” again below to meet my exacting standards) with my yummy homemade bread.  (I still count it as homemade - even if it was all done by a machine, it was made in my home!)

Barbecue Style Grilled Cheese
makes 2
4 thick-cut white bread slices (Texas toast)
2 slices cheese
4 slices bacon, cooked
1 tomato, cut into 4 slices
6 thin slices avocado
2 teaspoons butter, softened
2 tablespoons Miracle Whip
2 tablespoons salsa

Heat greased grill to medium-low heat.

Fill bread slices with cheese, bacon, tomatoes and avocados to make 2 sandwiches.  Spread outsides of sandwiches with butter.

Grill with lid closed 4 to 6 minutes or until cheese is melted and bread is grill marked, turning once.

Meanwhile, mix Miracle Whip and salsa.  Serve as a dip for sandwiches.

Here’s what I did:  Spread your favorite barbeque sauce on a slice of thick bread.  Add a slice of your favorite cheese (I used cheddar).  Top with 2-4 slices of bacon, or sprinkle with bacon bits.  Add another slice of cheese.  Microwave for 10-20 seconds, until cheese is soft but not completely melted.  (This insures that the cheese is nice and melty after grilling.  Yum!)  Place tomato slices and lettuce on top of cheese.  (You can wait and do this part after grilling if you prefer your tomato and lettuce cool.)

Butter another slice of bread and carefully spread the other side with barbeque sauce.  Place on sandwich, butter to the outside.  Carefully invert so that the butter side lies on a spatula or cookie turner.  Gently butter the outside of the other piece of bread.  (This should be fairly easy, since this slice should still be warm from the microwave.  Make sure your butter is softened – it makes buttering bread so much easier.)  Lay the sandwich on your grill as indicated above, or use a hot griddle or fry pan, turning when bread becomes golden brown.  (Be careful when turning that you don’t flip your veggies out of the sandwich.)

Here’s the way my family ordered.  (I felt just like a special-order fry cook.  Their own personal SpongeBob Squarepants.)

Littlest: just bacon and cheese
Middlest: just cheese (he’s a total grilled cheese freak and orders it every time we eat out.
And it was Festivus for the rest of us (thanks Jerry Seinfeld!) with varying levels of barbeque sauce.  My oldest raved and my husband even requested a specially-made second sandwich.  Nothing but crumby plates when dinner was over.  This is definitely going into our favorites file.

It’s not particularly pretty, but it looks great on a festive paper plate (hey, it was grill night - and apparently poet night too!) and it sure tasted good.  Add a bowl of tomato soup or pasta and potato salad and you're ready for a party!