

So much going on this time of year, and I really haven’t wanted to cook, let alone blog. But I am taking the time now, and it’s not because I’m procrastinating all the other stuff I have to do. Really. I’m not just trying to plant my behind in this chair because I can’t face cleaning up all the wrapping paper, gifts and Christmas breakfast dishes (not to mention the baking mess in the kitchen). Don’t believe me? Yeah, you’re a smart one, you are.
But I have been procrastinating this blog to the point that I’m feeling the guilt. And now that the Christmas craziness is over, I’m going to be plopping my behind in a chair somewhere or other in the house for the next hour or so anyway, so I may as well do something productive, and, well, here I am. Lots to blog about. Let’s hope I can remember what most of it is.
Let me start with the hope that you had a very merry Christmas, spent with loved ones gathered close and all your favorite foods. I love how food plays such a prominent part in our holiday celebrations. There are some foods that, when you make them, just the smells bring a feeling of Christmas contentedness. And there are just some things that you have to make or Christmas isn’t Christmas.
That being said, here’s one of the things that we do. For my husband and me it’s a fairly new tradition, but we’ve been doing it pretty much my kids’ whole lives, and it’s one of their favorite things about Christmas. We have the grandparents over for breakfast and present opening. Yes, we’re cruel that way and make the kids wait until after breakfast to open presents. Maybe because they’re used to it, there’s really not much complaining. They do get to open their stockings and eat one piece of candy, and we start breakfast early to cut down on the whining. And although I’m totally one for mixing things up, we seem to have settled into a rut routine as far as the food goes too. Breakfast quiche, fresh fruit and white hot chocolate. Mmm.

Quiche Lorraine
1 pie crust, baked
12 slices bacon, cooked and crumbled
1½ cups grated Swiss cheese
5 eggs
2 cups light cream or milk
¼ teaspoon paprika
½ teaspoon salt
1/8 teaspoon white pepper
1/8 teaspoon nutmeg
Heat the oven to 400°. Prepare the pie shell, sprinkle half of the Swiss cheese in the shell then crumble the fried bacon over the cheese. Sprinkle remaining cheese evenly over the bacon.
Mix together eggs, cream, paprika, salt pepper and nutmeg until well-blended and pour slowly over the bacon and cheese, taking care not to create bare spots. Cover pie crust edges with a thin strip of foil and bake quiche at 400° for 15 minutes. Reduce heat to 350° and bake for 20 minutes more. Remove foil covering and bake 10 minutes more. Serve like pie.
I’m not sure where I got this recipe ~ I think it originally came out of one of my Betty Crocker cookbooks ~ but we’ve been using it and loving it for years. I’ve tried other quiches (my family pretty much loves anything made mostly of eggs) but I keep coming back to this one. Everyone thought it was one of the best, and even the grandparents kept complimenting it.
Here’s what I did. First, you start with one of these, in our case two. I know I’ve mentioned these babies before, but they are just so good. So much tastier and easier than making your own. (Ok, so much tastier and easier than making MY own. If you want to make your own, feel free.) Since I’m going to be baking the quiche again, I always bake the pie crust at the lowest recommended time. Most quiche recipes call for you to pour the egg mixture into a hot pie crust, and while they usually cook better that way, it’s not strictly necessary for this one, so if you need to, you can bake your pie crust ahead of time.
Since I usually buy my Swiss in slices, which is really hard to grate, and I really didn’t feel like tearing it up into little pieces, which is what I usually do, I just laid a slice in the bottom of the pie crust. Then I sprinkled in the bacon (I use this, which I always have in the fridge) and laid another slice of cheese on top. Mixed up the eggs, cream and spices (I actually followed the recipe this time, no substitutes ~ can you believe it? ~ not even season salt!) and poured it all over the top. I covered the crust edges with foil (which I did not remove, as it was slightly stuck to the egg and I didn’t want to burn myself ~ again) and they turned out great. Very pretty. I did the quiche the day before and stuck them in the refrigerator, heated them up early Christmas morning. Very nice.
Big BIG thanks go to my rockstar Chef Tess Bakeresse for the white hot chocolate this year. I asked her if she had a good recipe (I’ve been using Martha Stewart’s for several years, but wanted something new) and she sent me the recipe below. She told me she needed to field test this recipe and I jumped at the chance to use my little animals as guinea pigs. I made up a batch of the instant mix several days before and they went hog wild. (I don’t like the taste of powdered milk and couldn’t get past it, but they didn’t even seem to notice.) They love melty marshmallows though, and insisted on adding some in after their first taste. I was planning on making some vanilla bean whipped cream to go on top, but then I had another idea. I made a few modifications to the hot chocolate recipe (sorry Chef Tess! ~ just added real milk and cream) and made up a batch of vanilla bean marshmallows, and it was a BIG hit Christmas morning.
To make the hot chocolate and it’s accompanying marshmallows, I wanted to try some vanilla bean sugar. I have never bought vanilla beans, and jumped on line to try to find some. I was quite discouraged at what I read ~ so many people saying that they arrived all dried out and brittle ~ and at the price. YIPES! Luckily I found that my local “can’t find it in Wal-mart” kitchen supplier sells vanilla beans for much, much cheaper. (I had to call to find out, as I couldn’t find them on their website. If you live in Utah you really need to check these guys out. They have just about everything I read about on cooking blogs that I can’t find anywhere else.) And when I went to pick them up the saleslady told me they had just gotten them in, and they were so fresh and yummy.
I have read several places about making vanilla sugar by leaving a bean in a canister with the sugar for weeks, months, years... But I am an instant gratification kind of girl, and I wanted my vanilla sugar NOW! Then I came across this recipe and did a little happy happy joy joy dance. I read several other recipes online and adapted it a little to fit my own little desires. This is what I finally ended up with.

M’s Vanilla Bean Sugar
5 cups granulated sugar
(I used 2 cups of this, and wondered if I could have made vanilla bean powdered sugar ... maybe next time)
5 fresh vanilla beans
Cut the vanilla beans into 3-4 pieces.
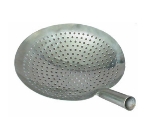
Add all vanilla bean pieces and about a third of the sugar to a food processor and grind for several minutes. Pour mixture into a sieve or strainer (I used my handle strainer, which looks something like this) over a bowl and shake gently. Return larger bits of vanilla bean to the food processor, add another third of sugar and process again. Repeat straining and processing until beans and sugar reach desired consistency. (My food processor blades kept getting gummed up ~ those vanilla beans really were fresh! ~ and I had to keep cleaning them off. I just pulled the gunk off with my fingers so I didn’t dampen the sugar. I was still left with several not quite little pieces of bean, but decided I didn’t care much and left them in.)
Since the concentration of bean to sugar changes with each batch, be sure to mix your sugar well before using. Store in a Ziploc bag or an airtight jar.
I used this vanilla bean sugar as the base for the rest of my Christmassy recipes, starting with this one:

source: skinnytaste.com
3 packets unflavored gelatin
1 cup COLD water
1½ cups granulated sugar
1 cup light agave syrup
¼ teaspoon kosher salt
1 tablespoon vanilla extract
1 vanilla bean, seeds scraped
2 tablespoons confectioners’ sugar, for dusting
Combine the gelatin and ½ cup of cold water in a small bowl; let it sit while you make the syrup.
Meanwhile, combine the sugar, agave, salt, and ½ cup water in a medium sized saucepan and cook over medium heat until the sugar dissolves. Raise the heat to high and, using caution not to boil over, cook until the syrup reaches 240° on a candy thermometer (careful it doesn’t boil over, this will be hot). Remove from the heat.
Add the gelatin mixture and scraped vanilla bean into the bowl of your stand mixer.
With the mixer on low speed, slowly pour the hot sugar syrup into the dissolved gelatin. Please be careful not to burn yourself with the HOT syrup, do not let the kids do this, you can get third degree burns if the hot syrup touches your skin.
Set the mixer to high speed and whip until the mixture expands and is very thick, about 17 minutes. This can be messy so if you have the protective lid attachment that came with your Kitchenaid, you might want to use that. Add the vanilla extract towards the end of the mixing.
With a sieve, generously dust the bottom of a 12x17” jelly roll pan or large glass baking dish with confectioners’ sugar. This is probably the most important step, skipping this step, the marshmallows will stick to the pan and never come off.
Pour the marshmallow mixture into the pan, smooth and dust with more confectioners’ sugar.
Let the marshmallows sit uncovered overnight until they dry out.
Use a cookie cutter to make pretty marshmallow shapes or turn the marshmallows onto a board sprinkled with confectioners’ sugar and cut them into squares. Dust with more confectioners’ sugar to prevent sticking.
My husband walked in as I was frothing the marshmallows in my Kitchen Aid. He bought it for me for Mother’s Day and seems to be delighted every time he sees me using it. He stared at me for a minute and said, “Wow, you look so domestic. When I married you I never thought you would ever be a crafty, domestic kind of woman.” Was that a compliment? I’m not quite sure...
I found agave nectar at Amazon.com, and not knowing much about it, bought the amber variety, which turned out to have more of a maple flavor, but the marshmallows tasted divine to me. I found it at Kitchen Kneads when I was there buying Vanilla beans, and will buy it there from now on, as it was remarkably cheaper and I could get a much bigger jar. If you don’t have (or don’t want) agave nectar, you can probably use karo syrup, although you might want to run that by someone more knowledgeable than I before making the switch.
In place of regular granulated sugar and vanilla beans, I just used my freshly made vanilla sugar. It worked very well. I also went wild dusting everything with powdered sugar and realized that I probably didn’t need as much as I used. I REALLY did not want these things to stick! I also sprayed it lightly with cooking spray before dusting, and they turned out very nice. Came off the pan easily, I must say. I gave some to family with a homemade hot chocolate mix (made before Chef Tess sent me her recipe, darn it!) and they seemed to go over very well. Littlest keeps asking me if he can have marshmallows for breakfast/lunch/snack... And they looked so pretty cut out like stars sitting there next to the hot chocolate...
And on that note, the pièce de résistance:

Chef Tess’s White Hot Chocolate
source: e-mail from the Bakeresse herself! (Yep, I have an in like that.)
1 cup instant milk powder
¼ cup sour cream powder (also found at Kitchen Kneads)
1 cup white chocolate chips
2 tablespoons vanilla pudding mix
¼ teaspoon chef tess wise woman
1/8 teaspoon cayenne pepper
Combine dry ingredients. Add 1 quart boiling water and stir until chocolate melts. Serve warm with a scoop of whip cream.
As I said, I am not much of a fan of powdered milk, so I mixed up a triple batch of all the dry ingredients and put it in a bag the night before. On Christmas morning I added the mix to 4 quarts of milk and ¾ cup whipping cream, heated it up and served. Oh. My. Best white hot chocolate ever. Have I mentioned yet what a rockstar Chef Tess is? If you haven’t checked out her blog, do it NOW! Mmm, yummy!
Oh yeah, I almost forgot the pudding mix. Chef Tess has an amazing pudding mix which I used to make the hot chocolate, and other stuff that I’ll put in another blog. I highly recommend using it, it is delicious!
Chef Tess’s Instant Pudding Mix
source: Chef Tess Bakeresse
½ cup sugar or sugar free “spoon-able” alternative
(I used my vanilla bean sugar)
1/3 cup ultra gel
(I got permission from Chef Tess to use cornstarch instead ~ then I found ultra gel at Kitchen Kneads and used it for my second batch of pudding mix)
1/8 teaspoon salt
1/8 teaspoon LorAnn flavored oil of your choice
1/8 teaspoon LorAnn flavored oil of your choice
(I used Bavarian cream, which I had purchased for something else, but oh wow, it made for an awesome flavor!)
Just mix all the ingredients together and you have your pudding mix. I made a triple batch, so I used my Kitchen Aid, but you could easily mix it up with a spoon. Easy peasy lemon squeezie, and so much nicer than boxed pudding mix.
Enough recipes for you? (There are more coming. Although I didn’t feel like cooking, I haven’t just been sitting on my behind all month!) After all that work, it doesn’t look like much, but boy did it taste good. And it was just enough for a quick breakfast before tearing into the Christmas presents...

Okay. I love this post! Thank you!!
ReplyDeleteIt's pretty much all about YOU! You totally rocked our Christmas. Thanks you!!!
ReplyDelete*thank
ReplyDelete